

Tshirt Design With Sketch App
Hi there. My name is Darko, aka XLonche on 99designs, and I recently started designing T-shirts. I would love to share what I've learned about this field so far. In this tutorial, you will learn what it takes to design a T-shirt and most importantly, how to prepare the files for print.
Before jumping into the computer, you will need to create a sketch — it will be your guide while inking the outlines of the design.
All right. You have the sketch.
Lets import it into Adobe Illustrator CS6 (note: this can also work in CS5, but I'm not sure about older versions). I am using a template for the brush settings — you can find it at cartoonsnap. In Illustrator, you'll notice you can choose different weights for a brush: Ultra fine, Fine, Medium, Bold and Bolder.
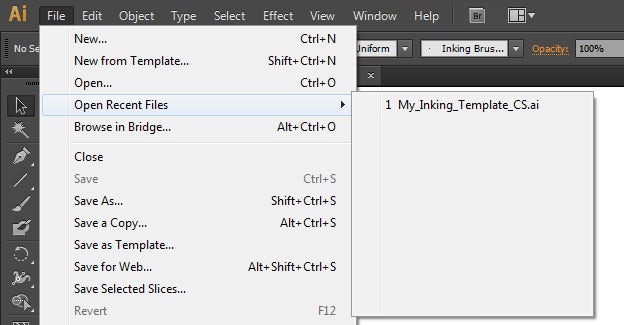
Let's open the brush template by going to File > Open Recent Files > find the file My_Inking_template_CS.ai from where you downloaded it, or if you've used it before, go to Open Recent Files and it will be there.
Now, let's open our sketch. Go to File > Place > find your image and press Okay. Or you can drag your sketch from Photoshop to the Illustrator document.
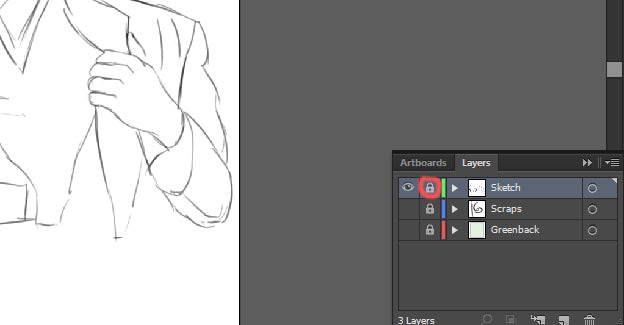
Double click the layer with your sketch, and check the box that says Dim Images to: 50%. Then, lock the layer by clicking the box next to the eye — a lock symbol will appear.
Create a new layer and name it whatever you want. You can do that by clicking the little paper icon at the bottom right of the Layers Palette.

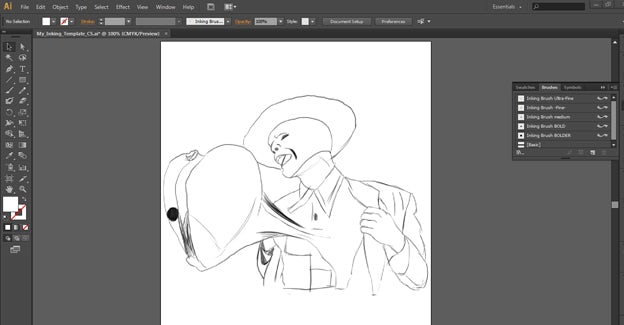
Select a brush and start inking the sketch. All the brush settings are set up, you just need to select the brush with a weight that varies from Ultra-fine to Bolder. I'm going to use a Medium and Bold brush.

Coloring
Once we are done with the inking, we need to turn all the brush paths into objects and merge them. To do this, go to Object Menu > click Expand. Then, go to Window > Pathfinder, click on the Unite icon.
Chose your colors, and go to Object > Live Paint > Make. You can paint the places you want with one click. Choose your color and choose the Live Paint Bucket tool (K).

Now click on the fields you want to color.
Note: Make a new layer below your lineart. For each color, make a new layer.

Let's add some highlights and shadows. Draw new objects above the color layers using the Pen Tool (P). Here's an example:

Now, make things interesting and play some music 😀
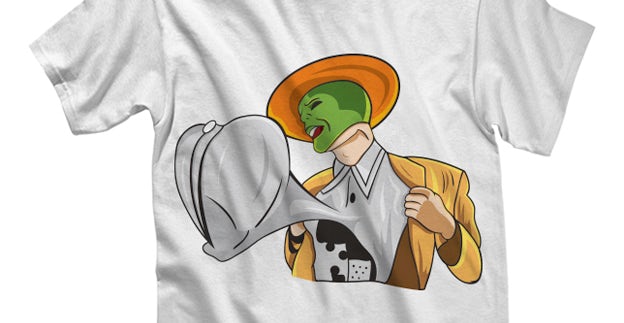
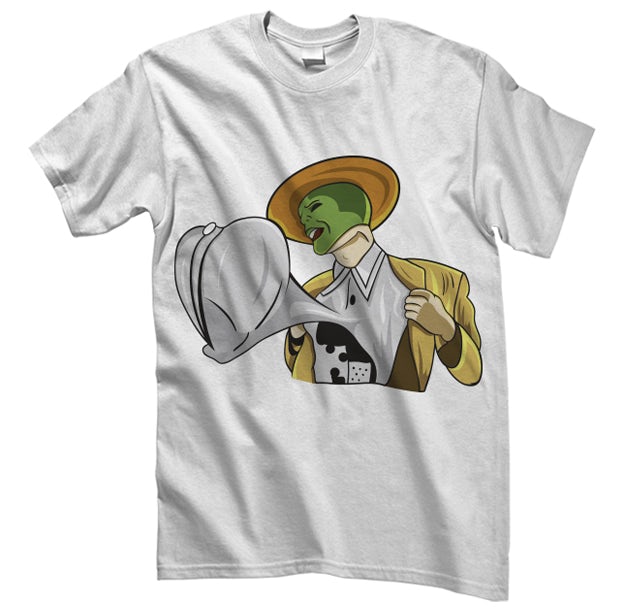
And finally… place it on a mockup.
Preparing design for print
1. Use PMS or CMYK color modes
You might be used to doing online artwork in RGB, but to ensure the most accurate colors with a silk screener, definitely use PMS and CMYK color modes. This also makes the color separations easy and accurate.
2. Convert all text to outlines
Sometimes your artwork may call for a very obscure font or maybe even a custom designed font. When sending your artwork off for print, the last thing you want to see, is a substituted font in your design. By converting the text to outlines, any computer that opens the artwork will view the text as an image. Therefore, no substitutions will be made.
3. Create artwork at actual size
Do not trust the printer's judgment without discussing it with them first. Your vision of the end product can be different from what the printer thinks is your end product. The safest way to defend yourself in this situation is to create the artwork in its final size. Don't know what size you want to use? Slap a ruler to the shirt you are wearing. Sounds simple, but it works.
4. Use vector artwork as much as possible
This is not an argument over raster vs. vector, just a suggestion to use vector artwork when possible. It makes color separations easier with the print coming out cleaner. This is a general rule for everyday jobs and not automatic in all situations.
5. Expand strokes
If you have properly set all of your colors to PMS swatches, then the color separations software will have no problem. This is more of a human error that occurs because sometimes strokes are overlooked. I put this tip at #5 because it can save you from ruining an otherwise great project. To expand your strokes, select what you want to expand then go to Object > Expand.
A huge thanks to designer Darko (aka XLonche) for this great tutorial! If you need more advice, he's the expert.
Tshirt Design With Sketch App
Source: https://99designs.com/blog/design-tutorials/create-a-t-shirt-design-and-prepare-it-for-print/
Posted by: castillorestled.blogspot.com
0 Response to "Tshirt Design With Sketch App"
Post a Comment